Publish Frequently Asked Questions
Select the option to view the Unit timetable in Publish:
Select Log in and enter your username or email address.

Select Find Timetable from the menu on the left of screen where you can find your enrolled/requested unit/s either by Unit, School/College or Room List Type options. The filters or search a unit code will adjust to meet your selection and provide a list of possible unit/s locations.
Default will be on Unit selection — Options are to enter a Unit code at top of screen under Find Timetable in the search option box or other options are to select School/College or Rooms under the List Type on the right of the page. It’s a good idea to know your unit codes before you begin the search process — if you don’t know your unit code/s, they can be found via the Course Search or Unit Search tools.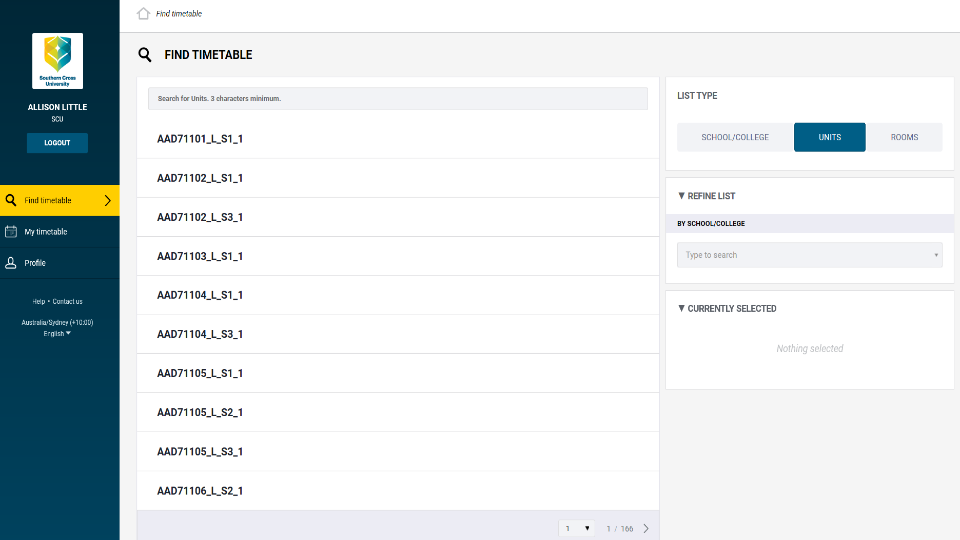
When you can see the correct unit location and study period, that you want to have on your timetable, select it from the list by clicking on it. This will then display in the Currently Selected section on the right of the screen — you can then add more units, as above, and they will also show in this section. Once you have selected all your units click on next from the Currently Selected option box.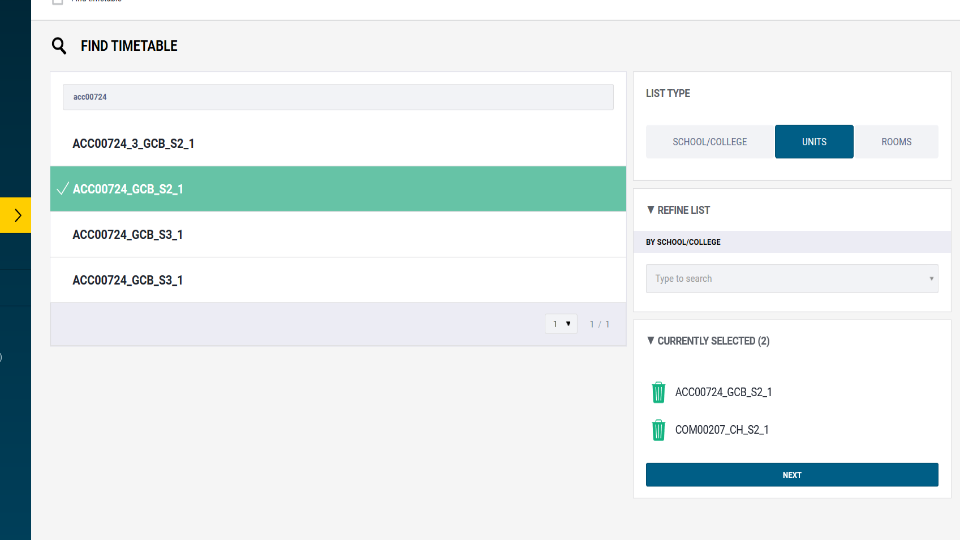
This page is where you can choose your class/es by clicking on them. They will then display in the Selected Classes box on the right on screen. Click on Preview or back if the incorrect unit was selected or you want to add more at this stage.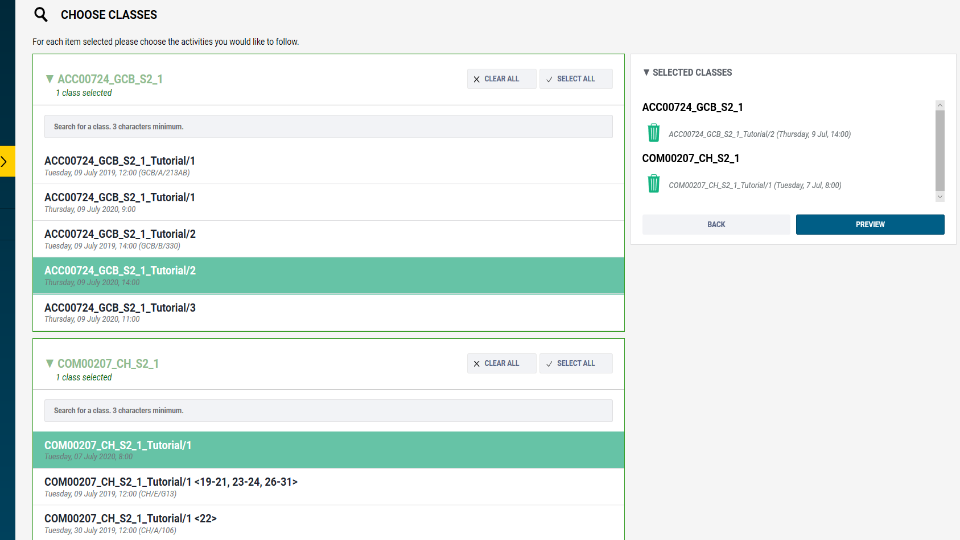
Here you can save this timetable or cancel. Also, able to view the timetable as a combined view, new units or existing units if you had already saved a previous timetable.
Click Save Timetable to keep these classes. First time saving it will bring up My Timetable page and shows a green message at the top of page.
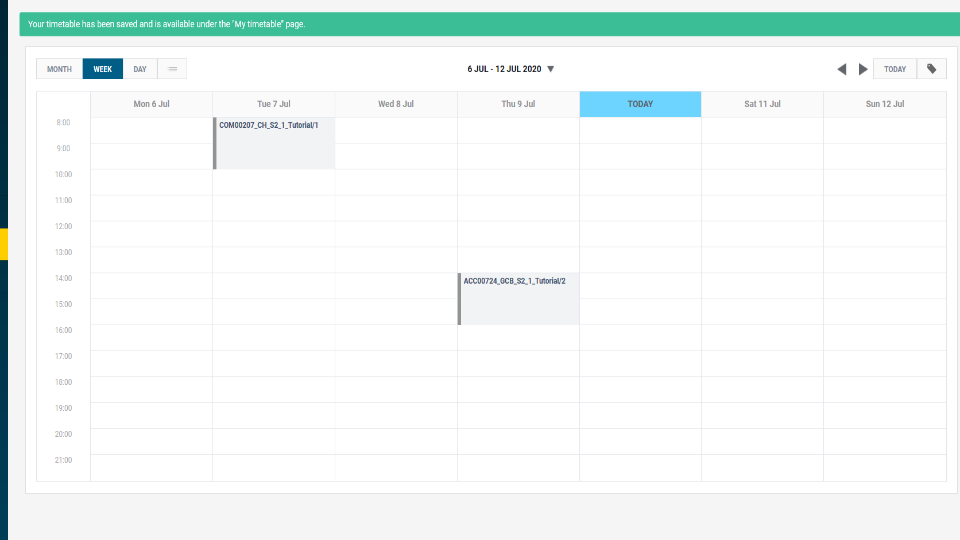
Once a timetable is saved and you are adding new units you will receive the following combined timetable view. If you would like to save this as your new timetable, with existing units, click on Save Timetable.
Then select COMBINE — if you want to remove your previously saved classes and keep these new ones select OVERWRITE.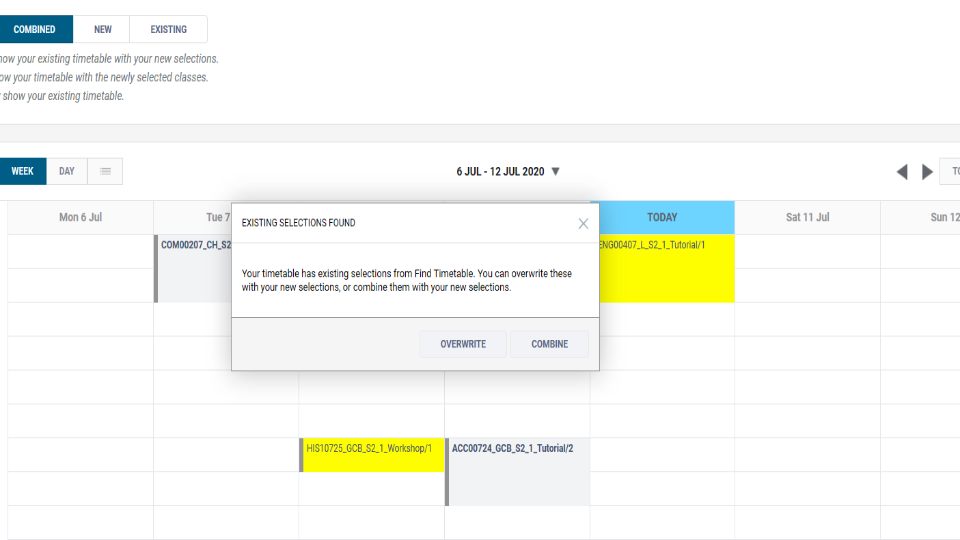
This will then bring up My Timetable page and shows the green save message at the top of page “Your Timetable has been saved and is available under the ‘My Timetable’ page.”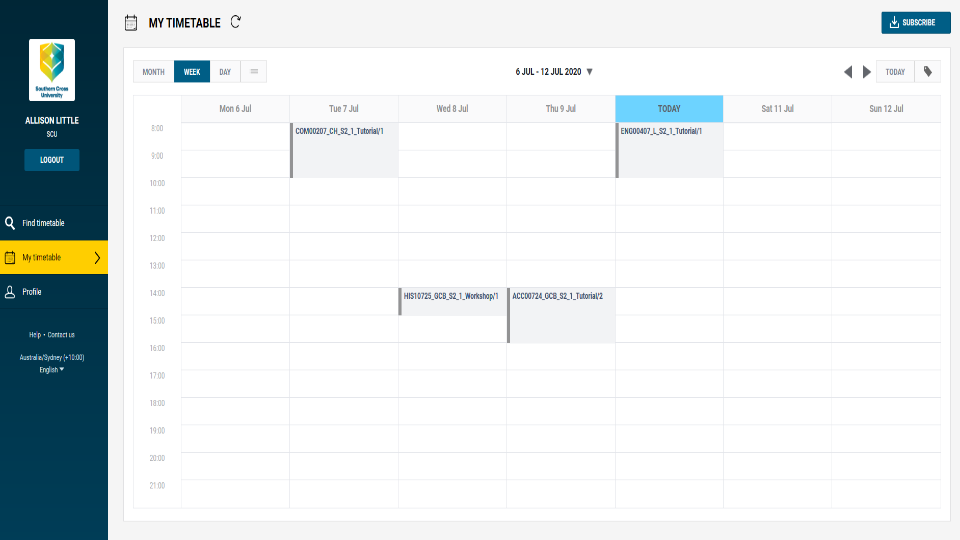
Select Find Timetable then under the List Type search on the right of screen select either School/College or Units option.
School/college
Select which School/College option you are wanting to view units for then select next.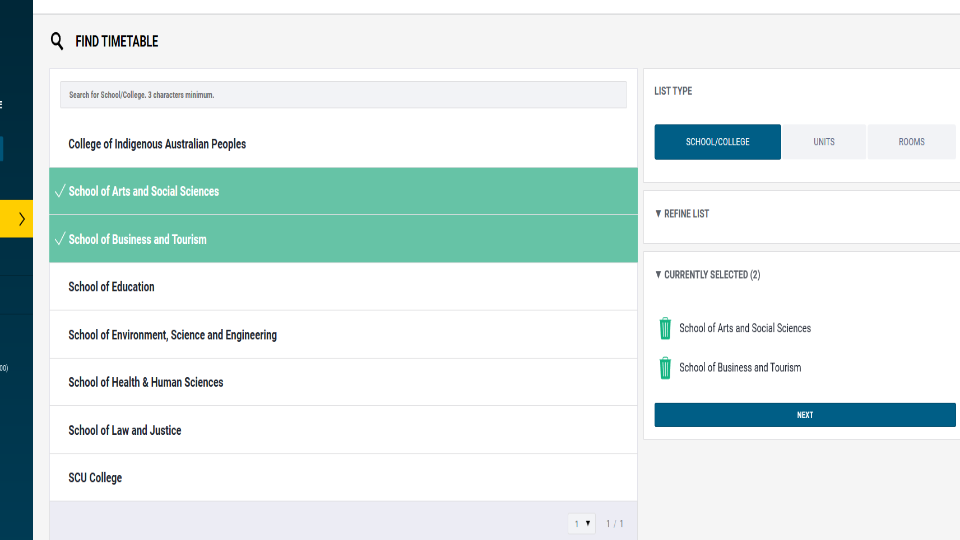
The search results will display.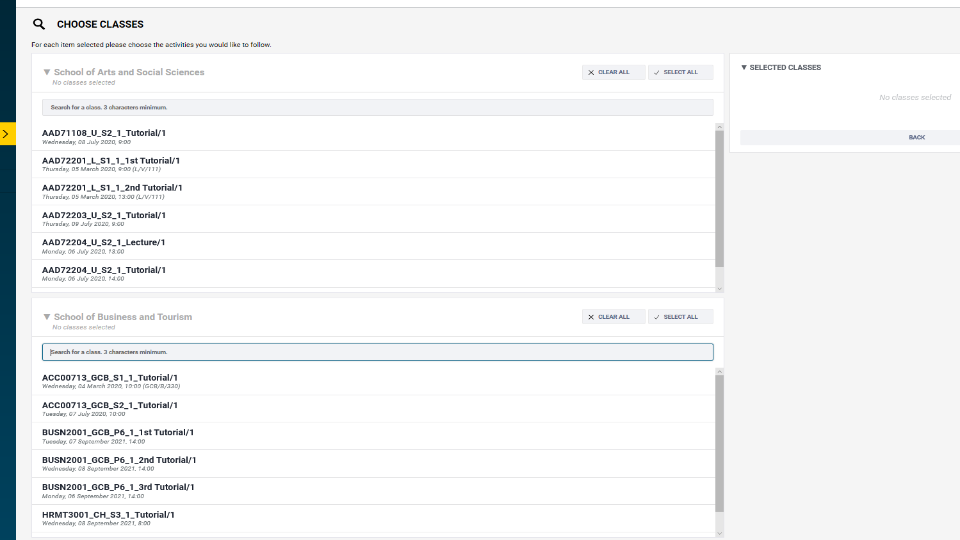
Enter either of the following into the Search for a class option box in each of the School/College results:
- _CH_ for Coffs Harbour
- _L_ for Lismore
- _GCB_ for Gold Coast
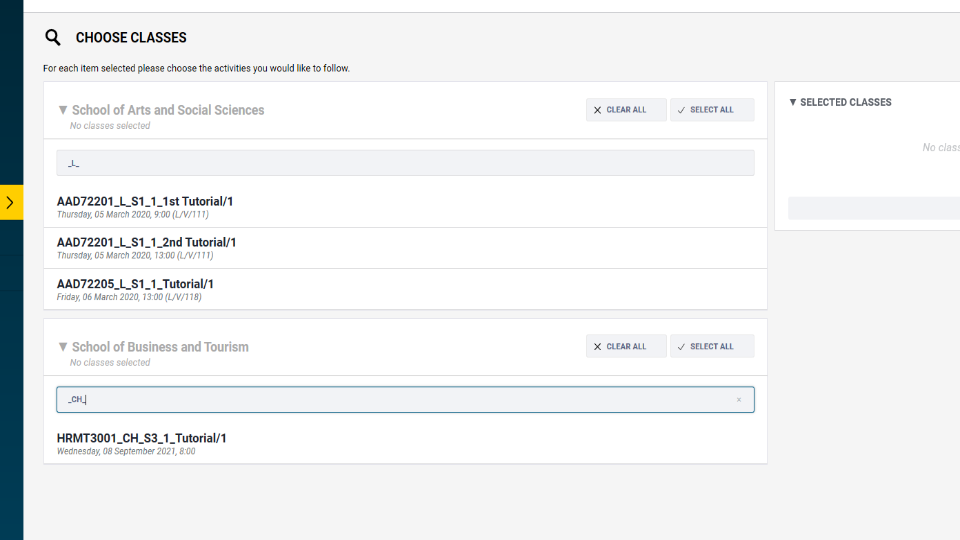
This campus search option is also available in the Units List Type section.
Units
Select Units option from List Type.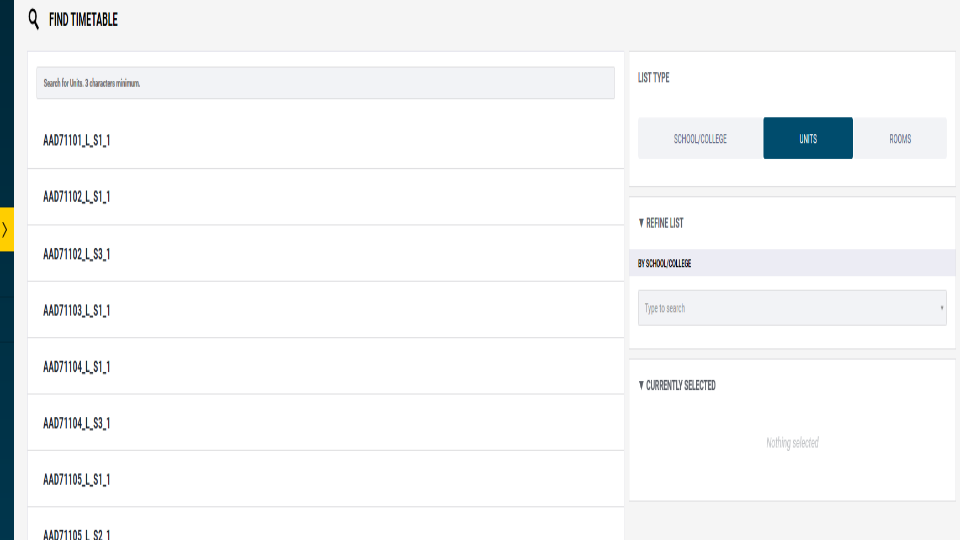
Enter either of the following into the Search for Units option box above the list of displayed units:
- _CH_ for Coffs Harbour
- _L_ for Lismore
- _GCB_ for Gold Coast
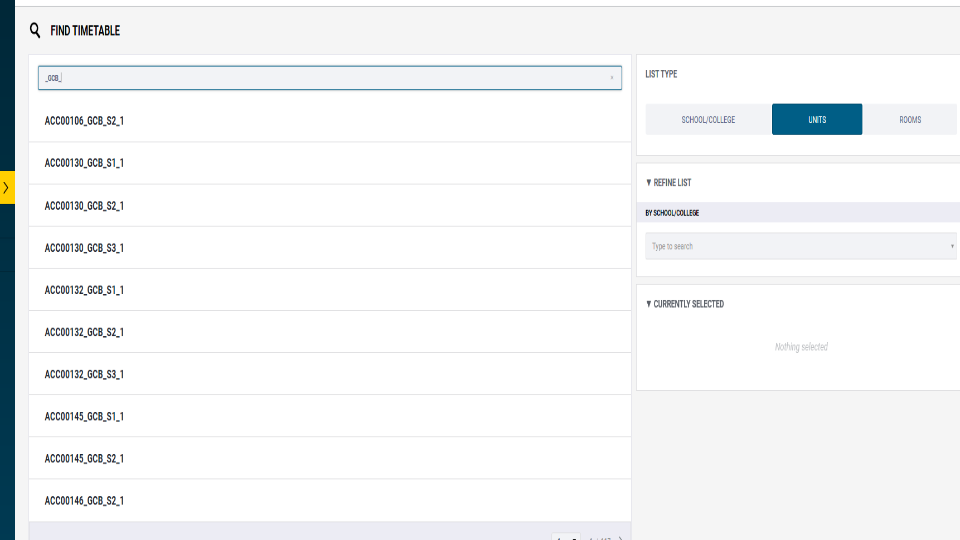
In the space for Search for Units you can enter partial values of the unit code, minimum of 3 characters and then the list filters below automatically.


In any of the views you can scroll from one week to the next using the arrow buttons at the top right of the page.

In any of the views you can scroll from one week to the next using the arrow buttons at the top right of the page.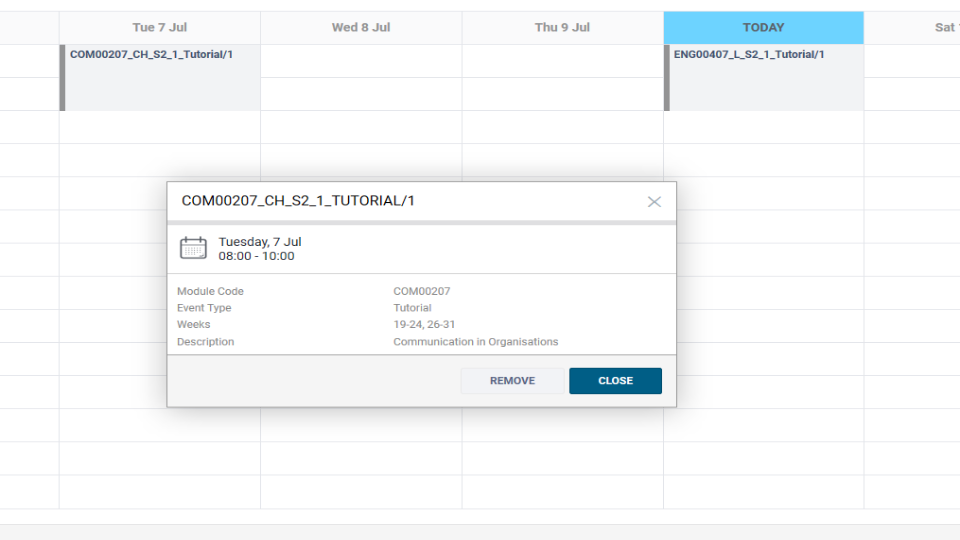
These numbers refer to the teaching calendar weeks. e.g. 19–24, 26–31 equals Session 2 Weeks 1–6, 8–13.
For information on the teaching calendar weeks please refer to the Key dates/teaching calendar on the SCU webpage.
Search has no results
If the list timetable states ‘No data available in table’ then classes for your selected report options have not yet been scheduled.
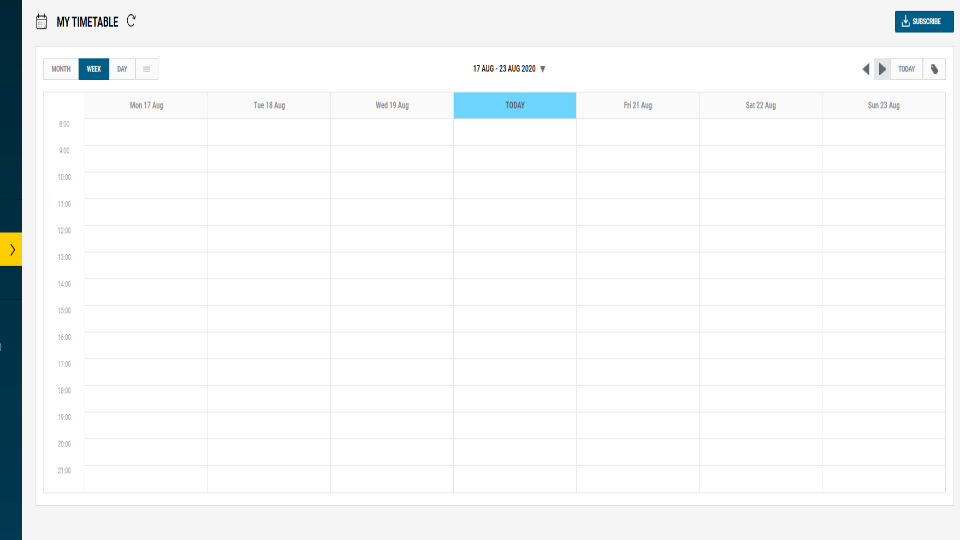
My Timetable has no results
If the My Timetable grid is empty after selecting and saving units please check your calendar week number at the top of the grid as not all units are run every week.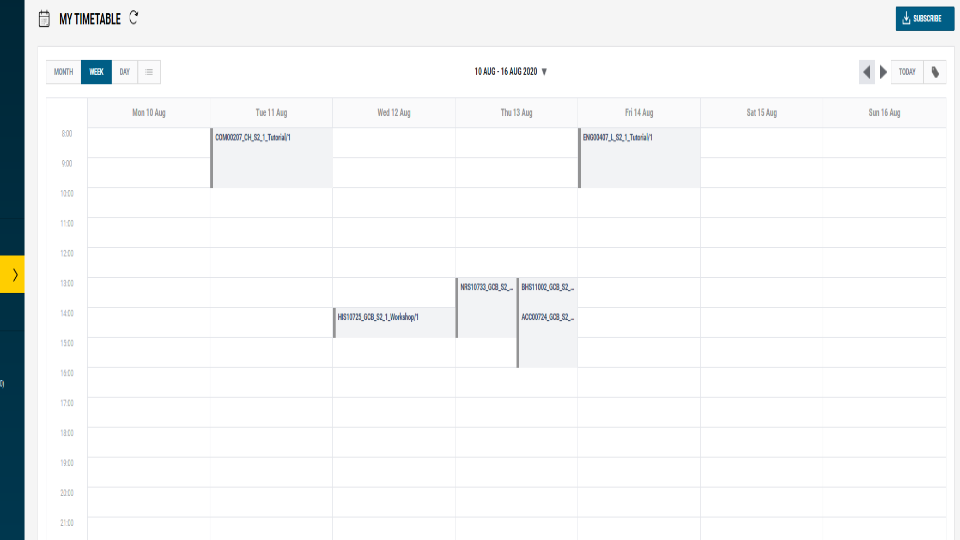
Let’s break down one of the classes you find listed to help you understand what it means:
The Class Activity Name is separated by the underscore character. E.g. for the activity name NRS10731_GCB_S1_1_Tutorial/1 <1-2, 4-6, 8-13>, the first section is the unit code, the next part is the location code (in this case GCB or Gold Coast), the next part is the study period (in this case S1 or Session 1), then the availability number, the Activity Name and Class Number are joined with a slash character (Tutorial, class 2) and finally the weeks that this activity is being run within the teaching period.
Room names consist of campus code, building code and room number. Broken down this is what it means:

Lismore: L
Gold Coast: GCB
Coffs Harbour: CH
National Marine Science Centre: NMSC
The Room ID indicates the level in the building and the room number. Other than for the Gold Coast, the first number refers to the building level, and at the Gold Coast the first 2 numbers indicate the building level. The last two numbers indicate room number.
For example, you are studying PHAR2001 at Coffs Harbour in Term 1, which has a workshop and 2 tutorials. Publish will display the following:
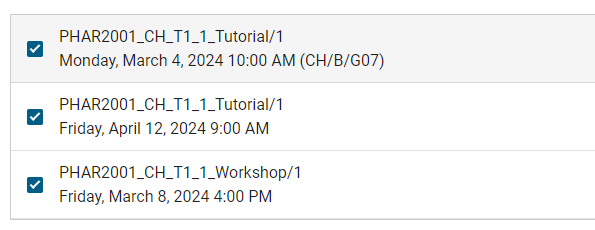
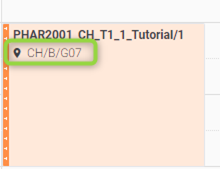
Where a tutorial is taught face to face ON-CAMPUS, it will be shown with a room listed
ie: PHAR2001 Tutorial – Coffs Harbour – Term 1. See image, below
Where a tutorial or workshop is being taught ONLINE, regardless of the location – a room will not be displayed. See image, below:
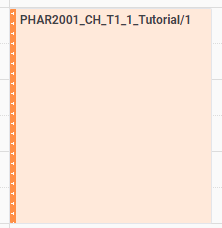

When selecting your classes, it is important to know how many classes and what class types you must select (e.g. one unit may require one lecture and one tutorial per week for the teaching period, while another unit may require one lecture and two workshops). The contact hours for a unit, which identifies which classes you must attend, can be found in the Unit Outline.
This means your tutorial is not held every single week of the teaching period, but only on these weeks. Week 1 is the first week of session/study period.
Select the Profile option on the left of your page.
Under the Notifications section you can opt in to receive an email notification for any changes made to any of your saved units within two weeks from the class commencement. Un-tick the ‘I don’t want to receive notifications’ box and ensure your correct email address is in the ‘I want to receive email notifications’ at box.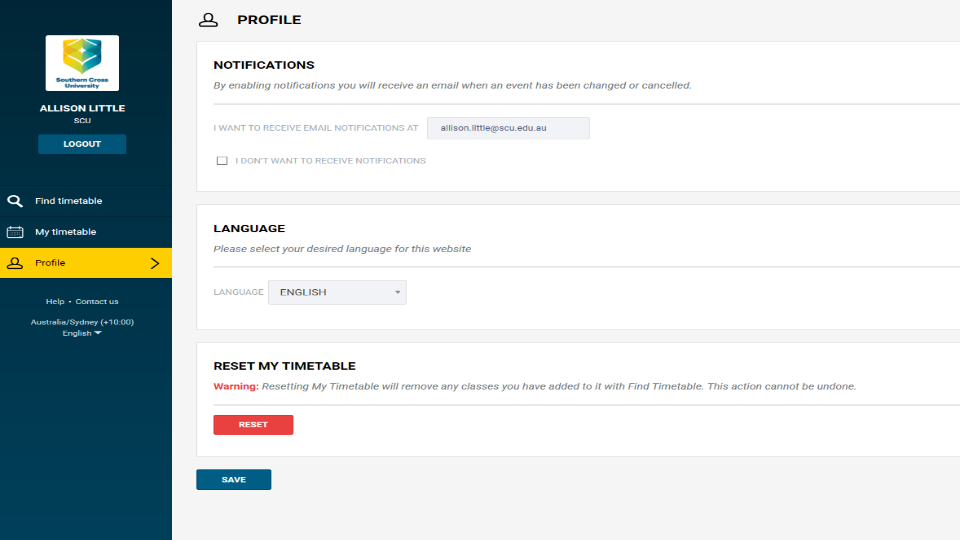
Yes, you can.
Select the Profile option on the left of your page. Under the Language section you can use the dropdown menu to select your desired language.
Select Subscribe to add your saved classes to your calendar as an iCal format. Please consult your relevant provider for all instructions including syncing.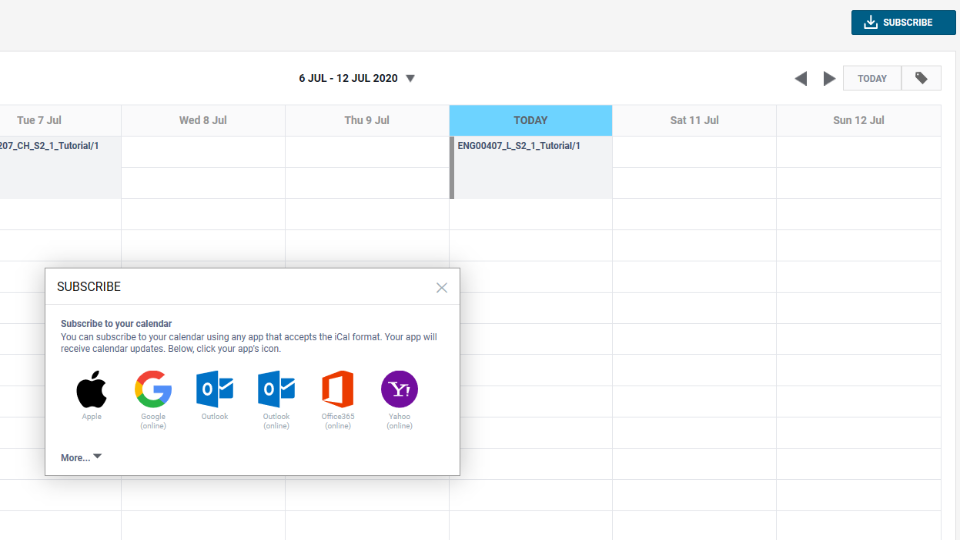
Select the Profile option on the left of your page. Under the Reset My Timetable section you are to reset all classes/bookings that you have save to your My Timetable by clicking on the red Reset button. This cannot be undone.

/prod01/channel_8/media/scu-dep/current-students/images/Coffs-harbour_student-group_20220616_33-147kb.jpg)
/prod01/channel_8/media/scu-dep/current-students/services/counselling/images/RS21533_English-College-Student_20191210_DSC_6961-117kb.jpg)
/prod01/channel_8/media/scu-dep/study/scholarships/images/STEPHANIE-PORTO-108-2-169kb.jpg)
/prod01/channel_8/media/scu-dep/study/arts-and-humanities/images/RS20958_Chin-Yung-Pang-Andy_20190309__79I5562-960X540.jpg)
/prod01/channel_8/media/scu-dep/experience/images/SCU-INTNL-STUDY-GUIDE-280422-256-72kb.jpg)
/prod01/channel_8/media/dep-site-assets/component-library/screenshots/online-1X1.jpg)